Season 2 - Episode #10 - How to build confidence in VNA test and measurement
Ever-higher operating frequencies for components and devices have led to something of a crisis of confidence in their test and measurement veracity. Fortunately, new solutions giving a trustworthy calibration along with verification standards are now available to provide a higher level of assurance for designers, manufacturers and their customers. In this latest podcast (accessible at the bottom of this page), Jamie Lunn, Product Manager for a family of network analysers at Rohde & Schwarz, explains. He has also written a more in-depth article around the topic which can be read below.
Throughout industry, users of vector network analysers have been able to provide reliable measurements for many years. Some users are highly experienced. They have extensive knowledge of measurement techniques, and the know-how to apply it to specialised devices and components. Others blindly follow a predefined procedure to extract the wanted measurement results. Whatever the level of expertise, getting good results typically relies on a network analyser and a calibration kit, which are periodically calibrated every 12 months by the equipment manufacturer or an accredited laboratory.
So, what exactly is the problem?
The first issue is that a year is a long time in the electronic component and devices world. In a very short time, just a small change in the measurement setup or environment can have huge unwanted effects - and overall the dependability of the results are influenced by many factors. Uncertainties can snowball with the addition of different test port cables and adaptors. Then there is measurement drift due to temperature changes, not to mention the wear and tear of the calibration standards. Last but not least, data sheets only give numbers derived under specific conditions - variables have a greater effect on performance as measurement settings are often different to those in the data sheet. Often these are not applicable to real-life test conditions. This is particularly relevant to higher-frequency environments. For example, the move from the sub 2.5 GHz 3G / 4G wireless networks up to 5G equipment using the higher FR2 frequency bands (in the region of 25 GHz to 50 GHz) means that parasitic effects, mismatches and other variables, have a more-than-incremental impact on system performance.
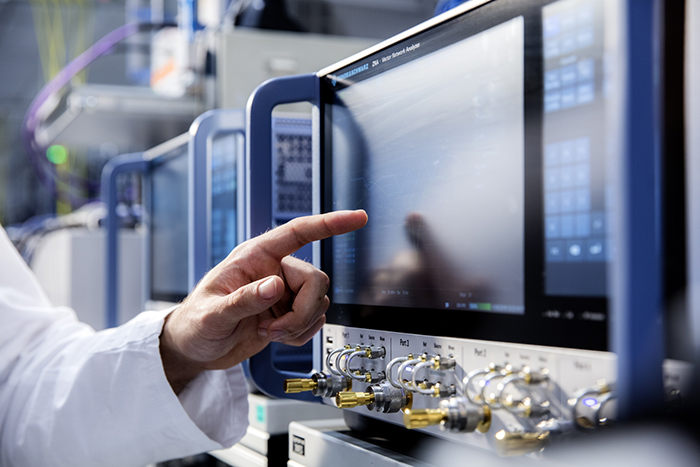
Above: ZNA in Calibration lab
It is easy to lose sight of such counsels of perfection. For many people on the test and measurement front line, there is little incentive to give full attention to these factors: no consideration for the effect on the overall measurement accuracy. The assumption is: that the instrument is accurate, the displayed results are correct and consistent, so their device must be meeting its specification.
Measurement accuracy
Whether they are aware or not, test engineers are not the cause of the problem. Management, sales and their customers have the headache that not knowing the overall measurement accuracy can reduce the quality of the device being measured. If there is no way to guarantee their accuracy and reproducibility, the numbers being given may be meaningless without reliable uncertainty information.
On the other hand, knowing the measurement uncertainty and hence how close the measurements are to the specification limit may help to improve overall yield and save money on expensive rework. Furthermore, properly calculated error bars can aid compliance to quality control standards like ISO 9000.
A further consideration is the cost penalty of delivering hardware that does not meet the specification. How can suppliers prove that their measurement results are correct? There may be friction if the customer measures the device and gets different results. How can this be resolved?
Then there is the scenario where calibration standards become damaged. There may be a long time interval where the faulty standard continues being used before it is noticed that measurement data is no longer correct. How many devices might need to be recalled and retested?
If there are pass/fail criteria, then knowing the measurement uncertainty allows devices that are closer to the limit line to be passed with confidence. This also saves time and money on expensive re-work. A key factor here is knowing when to perform a new user calibration. Production facilities typically carry out a new calibration once per day, or once per shift. This may be overkill, as scheduled calibrations do not provide information about whether re-calibration was really necessary. They are a brute force measure. Proof of the actual measurement uncertainty and reliability requires an additional measurement step to be used as a reference. This process is referred to as a verification measurement (usually using verification kits) and is only recently supported in network analysers such as the R&S®ZNA and R&S®ZNB.
Solution: Real-time S-parameter measurement uncertainty option
Up to now, calculating measurement uncertainty for a device’s S-Parameter results was only possible in a metrology lab. With new options such as the R&S®ZNA-K50 and R&S®ZNB-K50 Measurement Uncertainty Option, this calculation is done automatically, and the uncertainty bands are shown directly on the screen along with the measured S-Parameters. At the core of this development is a calculation engine based on solid measurement uncertainty science.
METAS is the National Metrology Institute (NMI) located in Bern, Switzerland. For the past decade, the institute has been providing their measurement uncertainty software “VNA Tools” to other NMIs and Metrology labs around the world. Their research and work on S-parameter traceability have put them at the forefront of VNA Measurement Uncertainty Science, and the worldwide adoption of VNA Tools is the direct result of this effort. This work is reflected in the simplicity of the modern network analyser interface on Rohde & Schwarz instruments.
The result is that test engineers can easily calibrate the VNA, using the same familiar process that has been used for the past few decades. No extra steps are required. After connecting the device under test, the measured S-parameters are presented with an immediate overlay of the measurement uncertainty that is updated in real time with each measurement sweep. No extra effort is required from the operator.
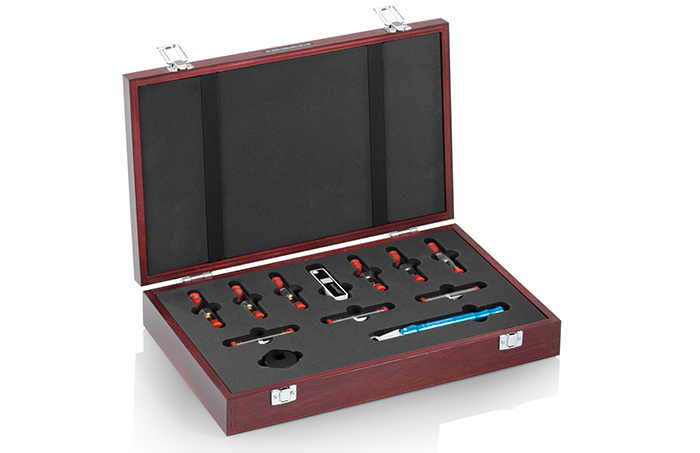
Above: ZN-Z229 calibration kit
In addition, the METAS-derived R&S ZNA-K50 and R&S ZNB-K50 options can be applied to perform verification testing. In combination with the VNA Tools calculation engine, this makes verification testing as easy to perform as a calibration itself. Users simply select the desired verification kit, the VNA then guides the user through a verification test; including the creation of a test archive that contains an uncertainty database for the measurement setup, raw measurement results, calibrated measurement results, and a pass or fail indication. Calibration and verification data, along with the measurements of the DUT are all available to METAS VNA Tools software via the VNA Tools project directory.
The result? Everything can be inspected, reports can be generated, results can be scrutinised. Furthermore, advanced users can apply their own vector correction algorithms to the raw data and compare these data to the METAS results. Metrology based calibration and verification exposes the influence of test port cables and measurement drift over time enabling better-informed decisions about how frequently a new user calibration should be performed. Over the long run this saves time and cost by eliminating unnecessary recalibrations. It also maintains the life of standards within calibration kits as they need not be reconnected so often.
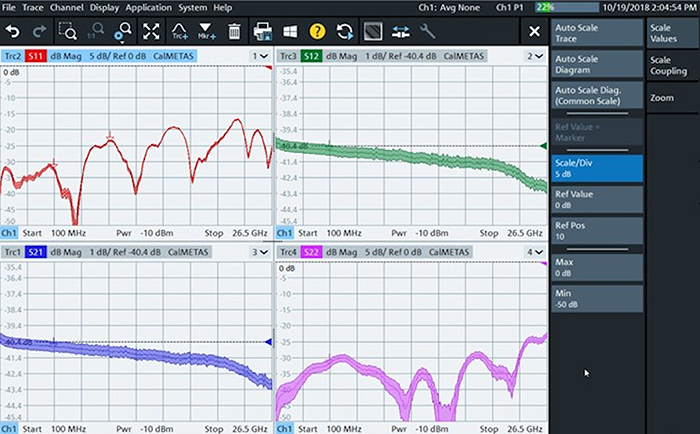
Above: ZNA-K50 sweeps with uncertainty bands
Finally, users can export a data project from the whole measurement process to be analysed offline in VNA Tools if the user wants to understand further what the contributing factors are to the measurement uncertainty. At last, accredited calibration and verification standards are available. It is a new level of assurance for designers, manufacturers and their customers and it is in agreement with the new *EURAMET VNA calibration guidelines.
*Guidelines on the Evaluation of Vector Network Analysers, EURAMET cg-12, 3.0 edition, 2018; available at https://www.euramet.org/publications-media-centre/calibration-guidelines/

